
Introduction to FeedJit Live Traffic Feed
I recently discovered FeedJit Live Traffic Feed and I am now using it on this site as well as a few others. FeedJit is a real-time log which appears as a widget on your sidebar of your website that keeps a record of your most recent 10 visits to your site and where the visitor came from. Founded in 2007 and based in Seattle, Washington, it is a useful tool for displaying the traffic to your site.
While researching the web, I did not see any detailed training on how to install Feedjit, so I devised this tutorial for you on how to install it on your site manually. It is pretty straight forward, but can be a little confusing in some areas.
If you are using WordPress to build a website, before reading my tutorial below, I did want you to know there is a WordPress FeedJit Traffic Feed plug-in available for ease of use and downloading. However, the issue is this particular plug-in has not been updated in more than two years, therefore, there is no guarantee of its effectiveness. I do not recommending downloading a plug-in that is not regularly updated. The sign below is from the FeedJit plug-in page. 
Another reason for following this simple tutorial is too many plug-ins in your WordPress site may slow down your site’s performance. If you can easily and manually install a new feature on your WordPress site, it makes sense to do so without running the risk of slowing down your website’s performance with yet another plug-in.
Step-By-Step on How to Install FeedJit Live Traffic Feed
Go to FeedJit Homepage.
You will see the following options on the screen:
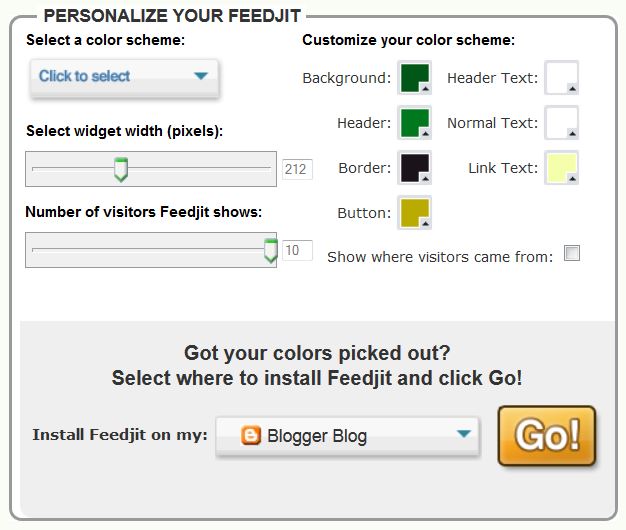
The first thing you will want to do is choose your color scheme.

Click on the button that says “Click to select” and choose a color scheme that match the colors of your website and best appeals to you. When you test out each color palette, you will notice how the live traffic feed on the FeedJit site changes to your selection. This gives you a clear idea how this color scheme will look on your website.
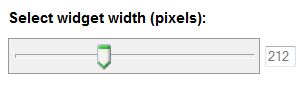
Once you selected the color scheme you want your live traffic feed to be, chose the widget width in pixels. You can leave it at 212 or make it a little larger or smaller.
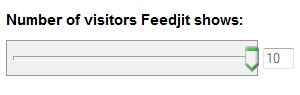
The next step is select how many feeds you want displayed on your website. The default is ten, but you can make it bigger or smaller. The sliding bar gives you the impression that you cannot have anymore than 10, but if you manually enter a number in the box, you can make it as large as 100.
Check the box indicated if you wish to show where the visitors came from. This can be a really neat feature, because you will be able to see what country each of your visitors is from. Thus, it allows you to see just how wide a range the exposure you are reaching.

Next, you select which type of platform you are using to build your website. If you are using Blogger Blog, you can leave this box as it is because that is the default.


Double check to ensure you have chosen all the correct features you desire on your live traffic feed and click on the Go button.
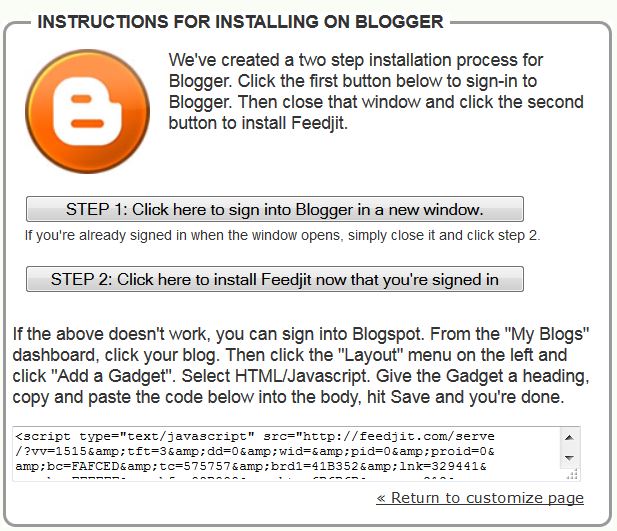
If you are using a Blogger Blog and selected the default, you will next see the following screen with instructions on how to install your live traffic feed on your Blogger Blog:
If you are using WordPress to build your website, your list of instructions will look like the following:
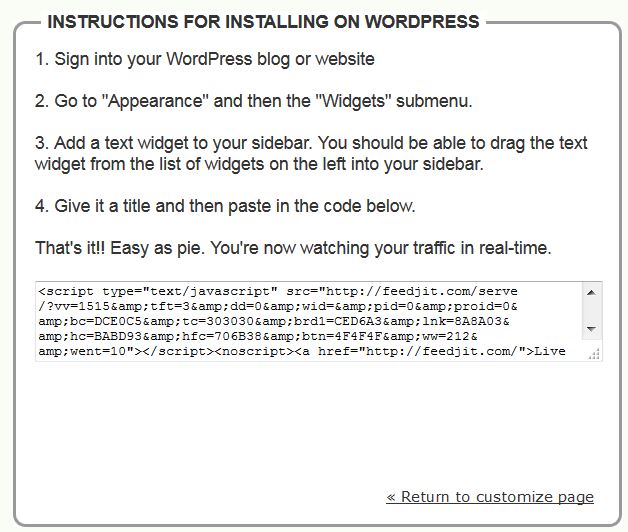
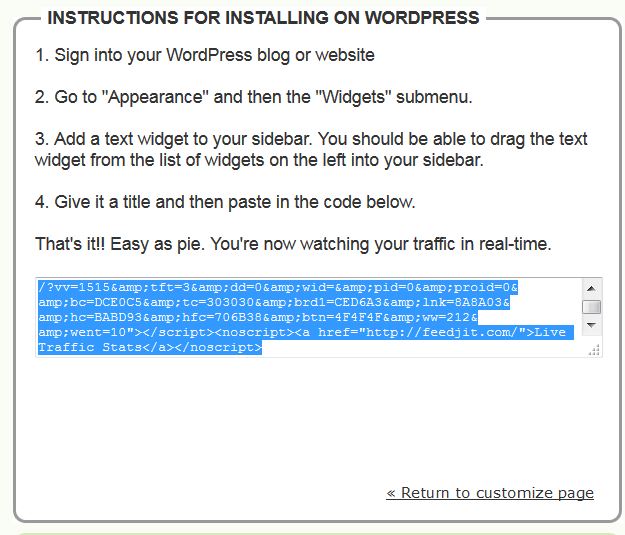
The text inside the box is known as Javascript. Select the Javascript in the box. Once the Javascript is selected, it will turn blue and look like the screen below (NOTE: Screen below is for a WordPress user). Right-click your mouse and select “Copy” or using your keyboard, hit CTRL and the letter “C” for copy.
Next, switch over to you the admin area of your website and create a new widget to add to the sidebar of your website. Paste the Javascript into the text box of your widget (NOTE: Screen below is for a WordPress user).
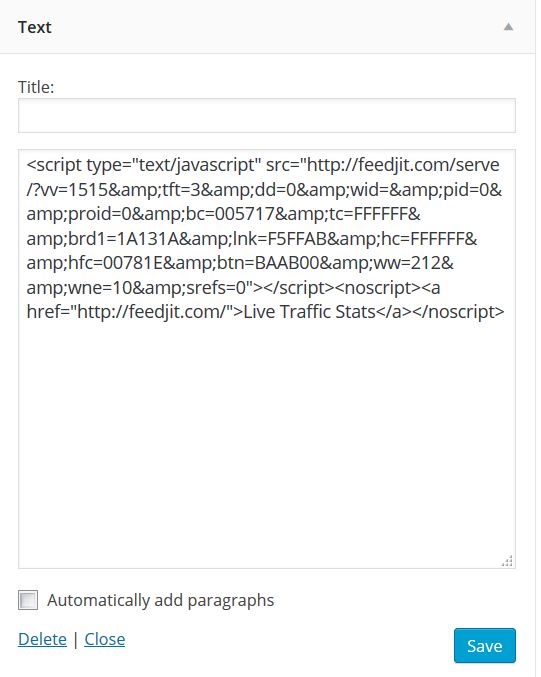
Save your changes and close your text widget.
Your last step will be to view your website in the browser to see your new live traffic feed displayed on your site. It should look similar to the traffic feed seen on this site. The colors maybe different as well as the number of feeds depending on what type of options you selected. If you are not seeing what you expected to see, double check each of the steps to make sure you did not forget anything.
Additional Help
I developed another tutorial on this FREE Live Traffic Feed which takes this tutorial a step further and shows you how to get the Javascript from FeedJit into your WordPress Dashboard and onto your website.
Feel free to leave comments or questions below regarding this post. I will reply shortly.
16 thoughts on “Free Live Traffic Feed & Tutorial”
feed jit does not work because blogger goes to https.
Hi there. I double checked my article and clicked on the link and it still works fine. Go to http://feedjit.com/ and follow the instructions. Let me know if you still have problems.
Hi Steph,
Lot of great information here. I only had a chance to read a few articles but I will be back . Can’t wait to see your new posts as you add them.
Hi Gloria:
Thank you for your kind comment. As you go through the articles and tutorials, please do not hesitate to ask me any question you may have. I can be reached at owner@legitimateonlineopportunity.com. Have a good day!
Steph
Thank you for your tutorial and article about the live traffic feed. I am trying to figure out how to see how much traffic I get and this tool is perfect for not only me but to allow other people to see how much traffic is coming to my site each day. Thank you again for taking the time to help others out.
Hi Jester:
Thank you for visiting my site today. The FeedJit is a great tool to track how much traffic your website is getting and where it is coming from. Please feel free to check out other areas of my website for similar information.
Steph
Yay! I did it successfully. Thank God I found this tutorial. Thank you so much for doing this =)
Hi Meina:
I am thrilled you were able to set up the FeedJit live traffic feed successfully on your website. The great thing is that it is free.
Steph
Hello Steph,
I’ve been thinking on getting that Free Live Traffic Feed on my site. Just really wasn’t sure how to do it. Your tutorial has come in handy in showing us how to instal it on our sites.
I do have a couple questions although I have an idea of what your going to say.
The platform I used to build my blog is within Wealthy Affiliate, so do I change the default from “Blogger Blog” to Other Blog or Website?
I really like the type of information you have going on here so I’m going to Bookmark it and will come back often to find answers.
Thanks
Markus
Hi Marcus:
Thank you for the comment. I am thrilled you are enjoying the type of information and resources I am publishing on my website. It is my desire to provide tutorials and assistance to those who are wanting to build an online business. In answer to your question regarding Wealthy Affiliate, you would select WordPress.org because Wealthy Affiliate uses the WordPress platform.
Thank you kindly for visiting and I am glad you will have this site bookmarked for further reference.
Steph
great tutorial, thanks for doing this.i do have a question, maybe you can help,I’ve tried blocking my own visits to my blog, the instructions are to click on option, but that just takes me to the download page with colour options, any ideas please?
Hi Bec:
I am glad you found the tutorial helpful. You asked how to exclude your IP address (block your own visits to your blog). I developed a tutorial for excluding your IP address in Google Analytics which may provide some assistance to you. Let me know if you still need help and I will gladly get back with you.
Steph
Nice work. I also use this to one of my websites. It is very useful. You did a wonderful tutorial as are all of your tutorials.
Hi Abaz:
Thank you for the comment. I am pleased you find it useful.
Steph
Hi Steph,
Nice job! You have laid this out with great directions. By the way, you have a really nice site here. Great Information throughout your entire site. I have bookmarked it and will be back! Till then keep up the good work.
Julie
Hi Julie!
Thank you for the kind comment. I am glad you found the site to be helpful. I look forward to seeing you again soon.
Steph